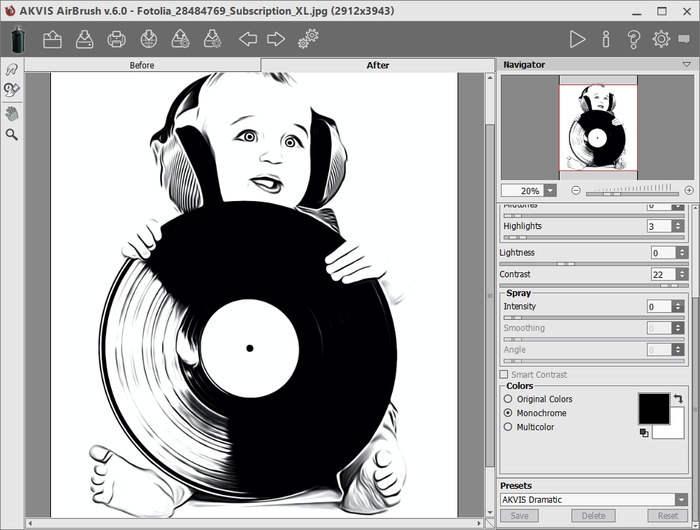
Workspace of AKVIS AirBrush
AKVIS AirBrush can work independently as a standalone program as well as a plug-in to a photo editor.
To launch the standalone version, run the program directly:
On a Windows computer - select it from the Start menu or use the program's shortcut.
On a Mac computer - launch the app from the Application folder.
To call the plugin, select it from filters of your image editing program.
The AKVIS AirBrush workspace looks like this:

The left part of the program's window is taken by the Image Window with two tabs - Before and After. The Before tab shows the original image, the After tab shows the result. To switch between the tabs and compare the original and the resulting images, just left-click on any point of the image.
In the upper part of the program's window you can see the Control Panel and the following controls:
Right mouse click on this button displays the list of recent files. You can change the number of recent documents in the program's preferences.
To the left of the main window there is the Toolbar. Different tools appear on the Before/After tabs.
Pre-Processing Tools (in the Before tab):
Post-Processing Tools (for Home Deluxe and Business licenses in the After tab):
Additional Tools:
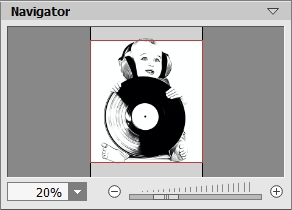
Navigate and scale the image using the Navigator. The frame in the Navigator surrounds the area of the image which is visible in the Image Window; the area outside of the frame will be shaded. The frame can be dragged, thereby changing the visible portion of the image. To move the frame, place the cursor within it, left click the mouse, and then drag.

Additionally, you can move the image in the Image Window with the scroll bars or by holding down the space bar, then holding down the left mouse button while moving the mouse. The mouse's scroll wheel can move the image up and down, and holding Ctrl on Windows, ⌘ on Mac – while using the scroll wheel will move the image left and right. Holding Alt on Windows, Option on Mac will scale the image. Right-click on the scroll bar to activate the quick navigation menu.
Use the slider or the buttons ![]() and
and ![]() to scale the image in the Image Window. When you click on the
to scale the image in the Image Window. When you click on the ![]() button or move the slider to the right, the image scale increases. When you click on the
button or move the slider to the right, the image scale increases. When you click on the ![]() button or move the slider to the left, the image scale reduces.
button or move the slider to the left, the image scale reduces.
You can also change the image scale by entering a new coefficient into the scale field and pressing the button Enter on Windows, Return on Mac. Frequently used scale coefficients can be found in a drop-down menu.
You can use hot-keys to change the image scale + and Ctrl++ on Windows, ⌘++ on Mac to increase the image scale and - and Ctrl+- on Windows, ⌘+- on Mac to reduce the scale.
Under the Navigator there is the Settings Panel with the tabs:
In the Presets field you can save the current settings as a preset to use them in the future. The current settings can be saved, edited, deleted. When you launch the program, it uses the settings of the last used preset.
Under the Settings Panel you can see Hints for the parameters and buttons when you hover over them with the cursor. You can choose where the hints will be shown or hide them in the program's Preferences.