The Magic Brush tool ![]() lets you select complex objects and is also helpful to improve the result achieved with the automatic selection tools. This intelligent brush works with color sets: it keeps some colors and deletes others.
lets you select complex objects and is also helpful to improve the result achieved with the automatic selection tools. This intelligent brush works with color sets: it keeps some colors and deletes others.
The Magic Brush keeps the points having the colors listed in the Keep Colors field and deletes the points having the colors listed in the Drop Colors field. Other colors are kept or deleted according to their closeness to one or another color set.

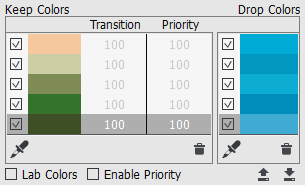
Click on the eyedropper's icon to activate the tool (Keep Color Picker or Drop Color Picker), then click on a point on the image.
When you click on the image with the eyedropper, it displays a Color Ring with 5 sectors that shows the information about the colors in this area:
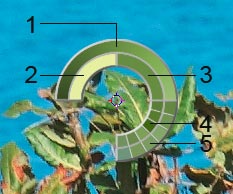
1. Gradient line with the current color in the center, on the left side is +30% black, and on the right side +30% white.
2. The previously selected color.
3. The current color of the pixel where the cursor is.
4. Colors of surrounding pixels.
5. Average colors from areas of 3x3, 5x5, 11x11, 31x31, 51x51, 101x101 px (around the eyedropper's tip).
Hint:
This smart tool helps you select colors more precisely. If it's hard to catch a certain color, you can see adjacent tints in the Color Ring and select the color on the ring while holding the Ctrl-key.
The check marks in the Keep/Drop lists define the colors that will be taken into consideration when calculating the result. To exclude a color from processing just uncheck it.
To delete a color from the list, select this color with a left-click of the mouse and click on ![]() . You can select several colors with the Ctrl-key. It's possible to clear the list using the menu that shows by right clicking on the list.
. You can select several colors with the Ctrl-key. It's possible to clear the list using the menu that shows by right clicking on the list.
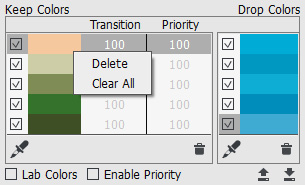
You can save the lists of the colors by using ![]() and load by clicking on
and load by clicking on ![]() .
.
Size is the tool's diameter (in pixels).
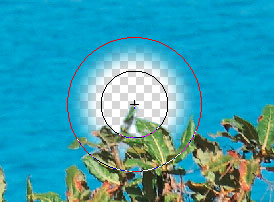
Hardness is the blurriness of the tool's edges. The lower the value the more blurry the tool's edges become.
 |
 |
| Hardness = 50 | Hardness = 100 |
|
|
|
| Before application of the tool | Using Drop mode |
|
|
|
| Using Keep mode | Using Keep & Drop mode |
Sensitivity to Keep Colors. The higher the value of this parameter, the wider the range of the colors kept on the image.
Sensitivity to Drop Colors. The higher the value of this parameter, the wider the range of deleted colors.
General Sensitivity. This parameter influences the amount of details recovered in difficult zones. The higher the value of this parameter, the more semitransparent details are visible.
In most cases the objects on a photo are not evenly lighted, therefore the cutout object can have shades and colors reflected from nearby objects. Such color shades can be absolutely inappropriate on a new background: for example, hair having a blue cast from the sky or a green shade from the trees, shadows of objects on clothes...
Foreground Recovery helps to get rid of these unwanted color shades. Just select a color with a click on the color plate. One click activates the eyedropper tool to pick a color from the image. Double click opens the Select Color dialog. If you set Transparency (with a right click on the plate), the brush will use the colors from the Keep Colors list.
The Strength parameter defines the influence of the applied color. The higher the value of the parameter, the more the colors are subject to change.
Apply the Magic Brush on the area you want to change, and the colors will get the chosen shade.
|
|
|
| Without Foreground Recovery |
Using Foreground Recovery green color selected |
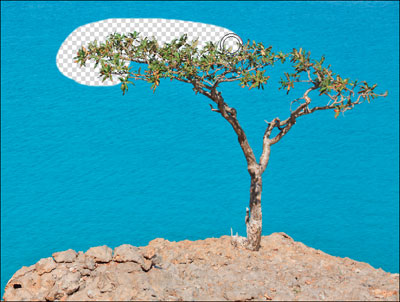
After you have adjusted the color sets and the parameters, draw over all areas you want to process.
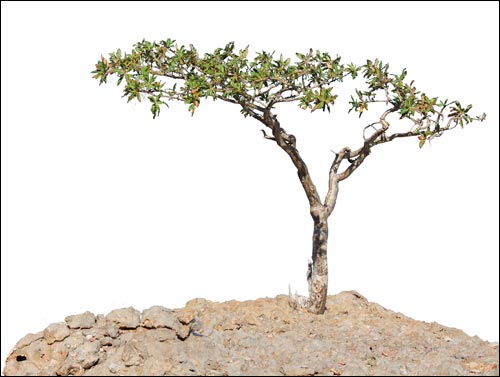
You can also use the post-processing tools to edit the result.