Batch Processing with Photoshop Plugin
The AKVIS plugins support the automation feature in Adobe Photoshop.
Batch processing is very useful and time saving when you have to apply the effects to a number of photos. This method applies the same settings to a folder full of images.
Even if you have never used batch processing you will find no difficulties in understanding it. First you create an Action in Photoshop and then apply it to a photo folder.
Follow the instructions:
- Step 1. Create two new folders, for example: "source-files" and "result-files". Place original images into the "source-files" folder. The results will be saved in the "result-files" folder.
- Step 2. Open one of the original images in Adobe Photoshop. We will use this photo to adjust the plugin's settings and create an action.
- Step 3. In the Actions palette click Create New Set button. In the dialog window give a name for a new set of actions, for example, "AKVIS Actions".
If you already have a special set for the AKVIS actions, you can just choose it.
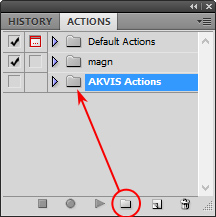 Actions Palette
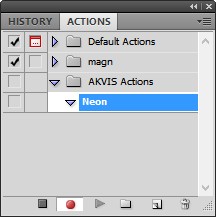
- Step 4. Press Create New Action and give a name for it, for example, "Neon".
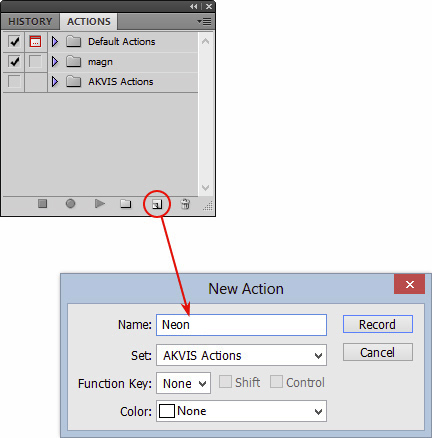 New Action
Press the Record button, and the recording of the action will immediately start.
- Step 5. Call the plugin and adjust its parameters.
- Step 6. Press the button
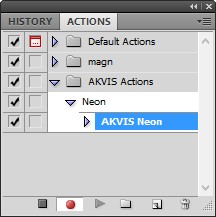
 . The plug-in window will close and the effect will be applied to the image. In the Actions palette, in your new action, you will see a new line with the plugin's name.
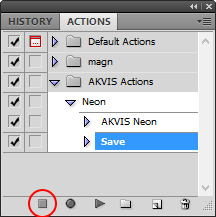
- Step 7. Remember that the action is still being recorded. Now, you should save the image. Choose Save As in the File menu and save the image into the destination folder.
- Step 8. Stop the action recording by pressing Stop playing/recording at the bottom of the Actions palette.
- Step 9. Delete the file that you have just saved.
- Step 10. The action is created and you can proceed to batch processing of the photos.
In the File menu of the editor choose Automate -> Batch.
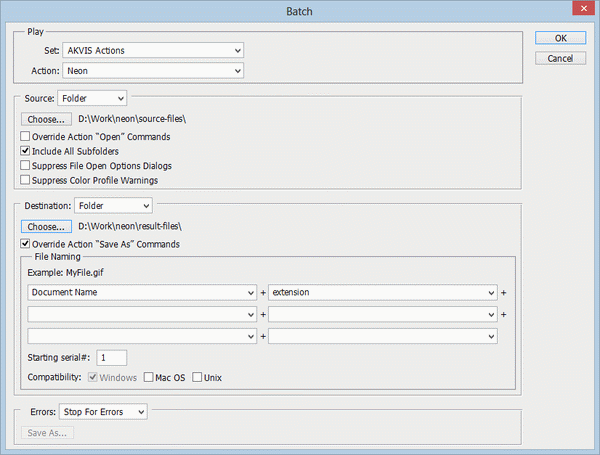
- Step 11. In the Batch dialog window and set the parameters:
- In the Set drop-down list choose "AKVIS Actions" and the new action.
- In the Source option set Folder. Press the Choose… button and select "source-files".
- As the Open command was not recorded in the action, the Override Action "Open" Commands check-box should be deactivated.
- For Destination select Folder, then press the Choose… button and select "result-files".
- Activate Override Action "Save as" Commands check-box.
- In the File Naming section you can create the filenames structure for the resulted images. If you do not want to change the names, in the first combo-box choose document name, and in the second - extension.
- Step 12. Press OK to start processing. Photoshop will apply the AKVIS plugin to all photos in the "source-files" folder, one by one, and will save them to the "result-files" folder.


